Building a Full Stack Flutter Application in Dart
Flutter is an open-source development framework developed by Google for developing cross-platform applications. It is used by frontend and full-stack developers for building cross-platform user interfaces from a single codebase. The abstractions that are built into the framework allow it to support mobile, web, and applications for MacOS, Windows, and Linux.
Cross-platform development has become increasingly important due to the growing demand for mobile apps, cost savings, and increased reach and engagement. By developing an application once using cross-platform technologies like Flutter, teams can reduce development costs, simplify maintenance and updates, and target a broader audience across different platforms, devices, and operating systems.
When combined with Nitric, portability is taken to a whole new level. Together, they enable developers to create applications that are not only high-performance but also extremely portable across different devices, platforms, and even clouds. This complimentary integration empowers developers to build robust applications that can adapt to changing user needs and environments.
Getting started
In this guide we'll go over how to create a basic Flutter application using the Nitric framework as the backend. Dart does not have native support on AWS, GCP, or Azure, so by using the Nitric framework you can use your skills in Dart to create an API and interact with cloud services in an intuitive way.
The application will have a Flutter frontend that will generate word pairs that can be added to a list of favorites. The backend will be a Nitric API with a key value store that can store liked word pairs. This application will be simple, but requires that you know the basics of Flutter and Nitric.
To get started make sure you have the following prerequisites installed:
- Dart
- Flutter
- The Nitric CLI
- An AWS, Google Cloud or Azure account (your choice)
Start by making sure your environment is set up correctly with Flutter for web development.
The finished source code can be found here.
flutter doctorDoctor summary (to see all details, run flutter doctor -v):[✓] Flutter (Channel stable, 3.24.0, on macOS darwin-arm64, locale en)[✓] Android toolchain - develop for Android devices (Android SDK version 35.0.1)[✓] Xcode - develop for iOS and macOS (Xcode 15)[✓] Chrome - develop for the web[✓] Android Studio (version 2024.1)[✓] VS Code (version 1.92)[✓] Connected device (4 available)[✓] HTTP Host Availability• No issues found!
We can then scaffold the project using the following command:
flutter create word_generator
Then open your project in your favorite editor:
code word_generator
Backend
Let's start by building out the backend. This will be an API with a route dedicated to getting a list of all the favorites and a route to toggle a favorite on or off. These favorites will be stored in a key value store. To create a Nitric project add the nitric.yaml to the Flutter template project.
name: word_generatorservices:- match: lib/services/*.dartstart: dart run $SERVICE_PATH
This points the project to the services that we will create in the lib/services directory. We'll create that directory and a file to start building our services.
mkdir lib/servicestouch lib/services/main.dart
You will also need to add Nitric to your pubspec.yaml.
flutter pub add nitric_sdk
Building the API
Define the API and the key value store in the main.dart service file. This will create an API named main, a key value store named favorites, and the function permissions to get, set, and delete documents. The favorites store will contain keys with the name of the favorite and then a value with the favorites object.
import 'package:nitric_sdk/nitric.dart';void main() {final api = Nitric.api("main");final favoritesKV = Nitric.kv("favorites").allow([KeyValueStorePermission.get,KeyValueStorePermission.set,KeyValueStorePermission.delete]);}
We will define a Favorite class to convert our JSON requests to Favorite objects and then back into JSON. Conversion to a Map<String, dynamic> will also allow us to store the favorites objects in the key value store. We can do this by defining fromJson and toJson methods, allowing the builtin jsonEncode and jsonDecode methods to understand our model. By defining this as a class it unifies the way the frontend and backend handle favorites objects, while leaving room for extension for additional metadata.
class Favorite {/// The name of the favoriteString name;Favorite(this.name);/// Convert a json decodable map to a favorite objectFavorite.fromJson(Map<String, dynamic> json) : name = json['name'];/// Convert a favorite object to a json encodablestatic Map<String, dynamic> toJson(Favorite favorite) =>{'name': favorite.name};}
For the API we will define two routes, one GET method for /favorites and one POST method on /favorite. Let's start by defining the GET /favorites route. Make sure you import dart:convert to get access to the jsonEncode method for converting the documents to favorites.
import 'dart:convert';import 'package:nitric_sdk/nitric.dart';api.get("/favorites", (ctx) async {// Get a list of all the keys in the storevar keys = await favoritesKV.keys();var favorites = await keys.asyncMap((k) async {final favorite = await favoritesKV.get(k);return favorite;}).toList();// Return the body as a list of favoritesctx.res.body = jsonEncode(favorites);ctx.res.headers["Content-Type"] = ["application/json"];return ctx;});}
We can then define the route for adding favorites. This will toggle a favorite on or off depending on whether the key exists in the key value store. Make sure you import the Favorite class from package:word_generator/favorite.dart
import 'package:word_generator/favorite.dart';import 'dart:convert';import 'package:nitric_sdk/nitric.dart';api.post("/favorite", (ctx) async {final req = ctx.req.json();// convert the request json to a favorite objectfinal favorite = Favorite.fromJson(req);// search for the key, filtering by the name of the favoritefinal keys = await favoritesKV.keys(prefix: favorite.name);// checks if the favorite exists in the list of keysvar exists = false;await for (final key in keys) {if (key == favorite.name) {exists = true;}}// if it exists delete and returnif (exists) {await favoritesKV.delete(favorite.name);return ctx;}// if it doesn't exist, create ittry {await favoritesKV.set(favorite.name, Favorite.toJson(favorite));} catch (e) {ctx.res.status = 500;ctx.res.body = "could not set ${favorite.name}";}return ctx;});}
Cross-Origin Resource Sharing
When we are making requests to our backend from our frontend, we will run into issues with Cross-Origin Resource Sharing (CORS) errors. We can handle this by adding CORS headers to our responses and adding OPTIONS methods to respond to pre-flight requests from the frontend. If you want to learn more about CORS, you can read here. Create a file called lib/cors.dart which is where we will define the middleware and options handler.
import 'package:nitric_sdk/nitric.dart';/// Handle Preflight Options requests by returning status 200 to the requestsFuture<HttpContext> optionsHandler(HttpContext ctx) async {ctx.res.headers["Content-Type"] = ["text/html; charset=ascii"];ctx.res.body = "OK";return ctx.next();}/// Add CORS headers to responsesFuture<HttpContext> addCors(HttpContext ctx) async {ctx.res.headers["Access-Control-Allow-Origin"] = ["*"];ctx.res.headers["Access-Control-Allow-Headers"] = ["Origin, X-Requested-With, Content-Type, Accept, Authorization",];ctx.res.headers["Access-Control-Allow-Methods"] = ["GET, PUT, POST, PATCH, OPTIONS, DELETE",];ctx.res.headers["Access-Control-Max-Age"] = ["7200"];return ctx.next();}
We can then add the options routes and add the CORS middleware to the API. When we add a middleware at the API level it will run on every request to any route on that API.
void main() {final api = Nitric.api("main", opts: ApiOptions(middlewares: [addCors]));api.options("/favorites", optionsHandler);}
Test
You can start your backend for testing using the following command.
nitric start
You can test the routes using the dashboard or cURL commands in your terminal.
> curl http://localhost:4001/favorites[]> curl -X POST -d '{"name": "testpair"}' http://localhost:4001/favorite> curl http://localhost:4001/favorites[{"name": "testpair"}]
Flutter Frontend
We can now start on the frontend. The application will contain two pages which can be navigated between by using the side navigation.
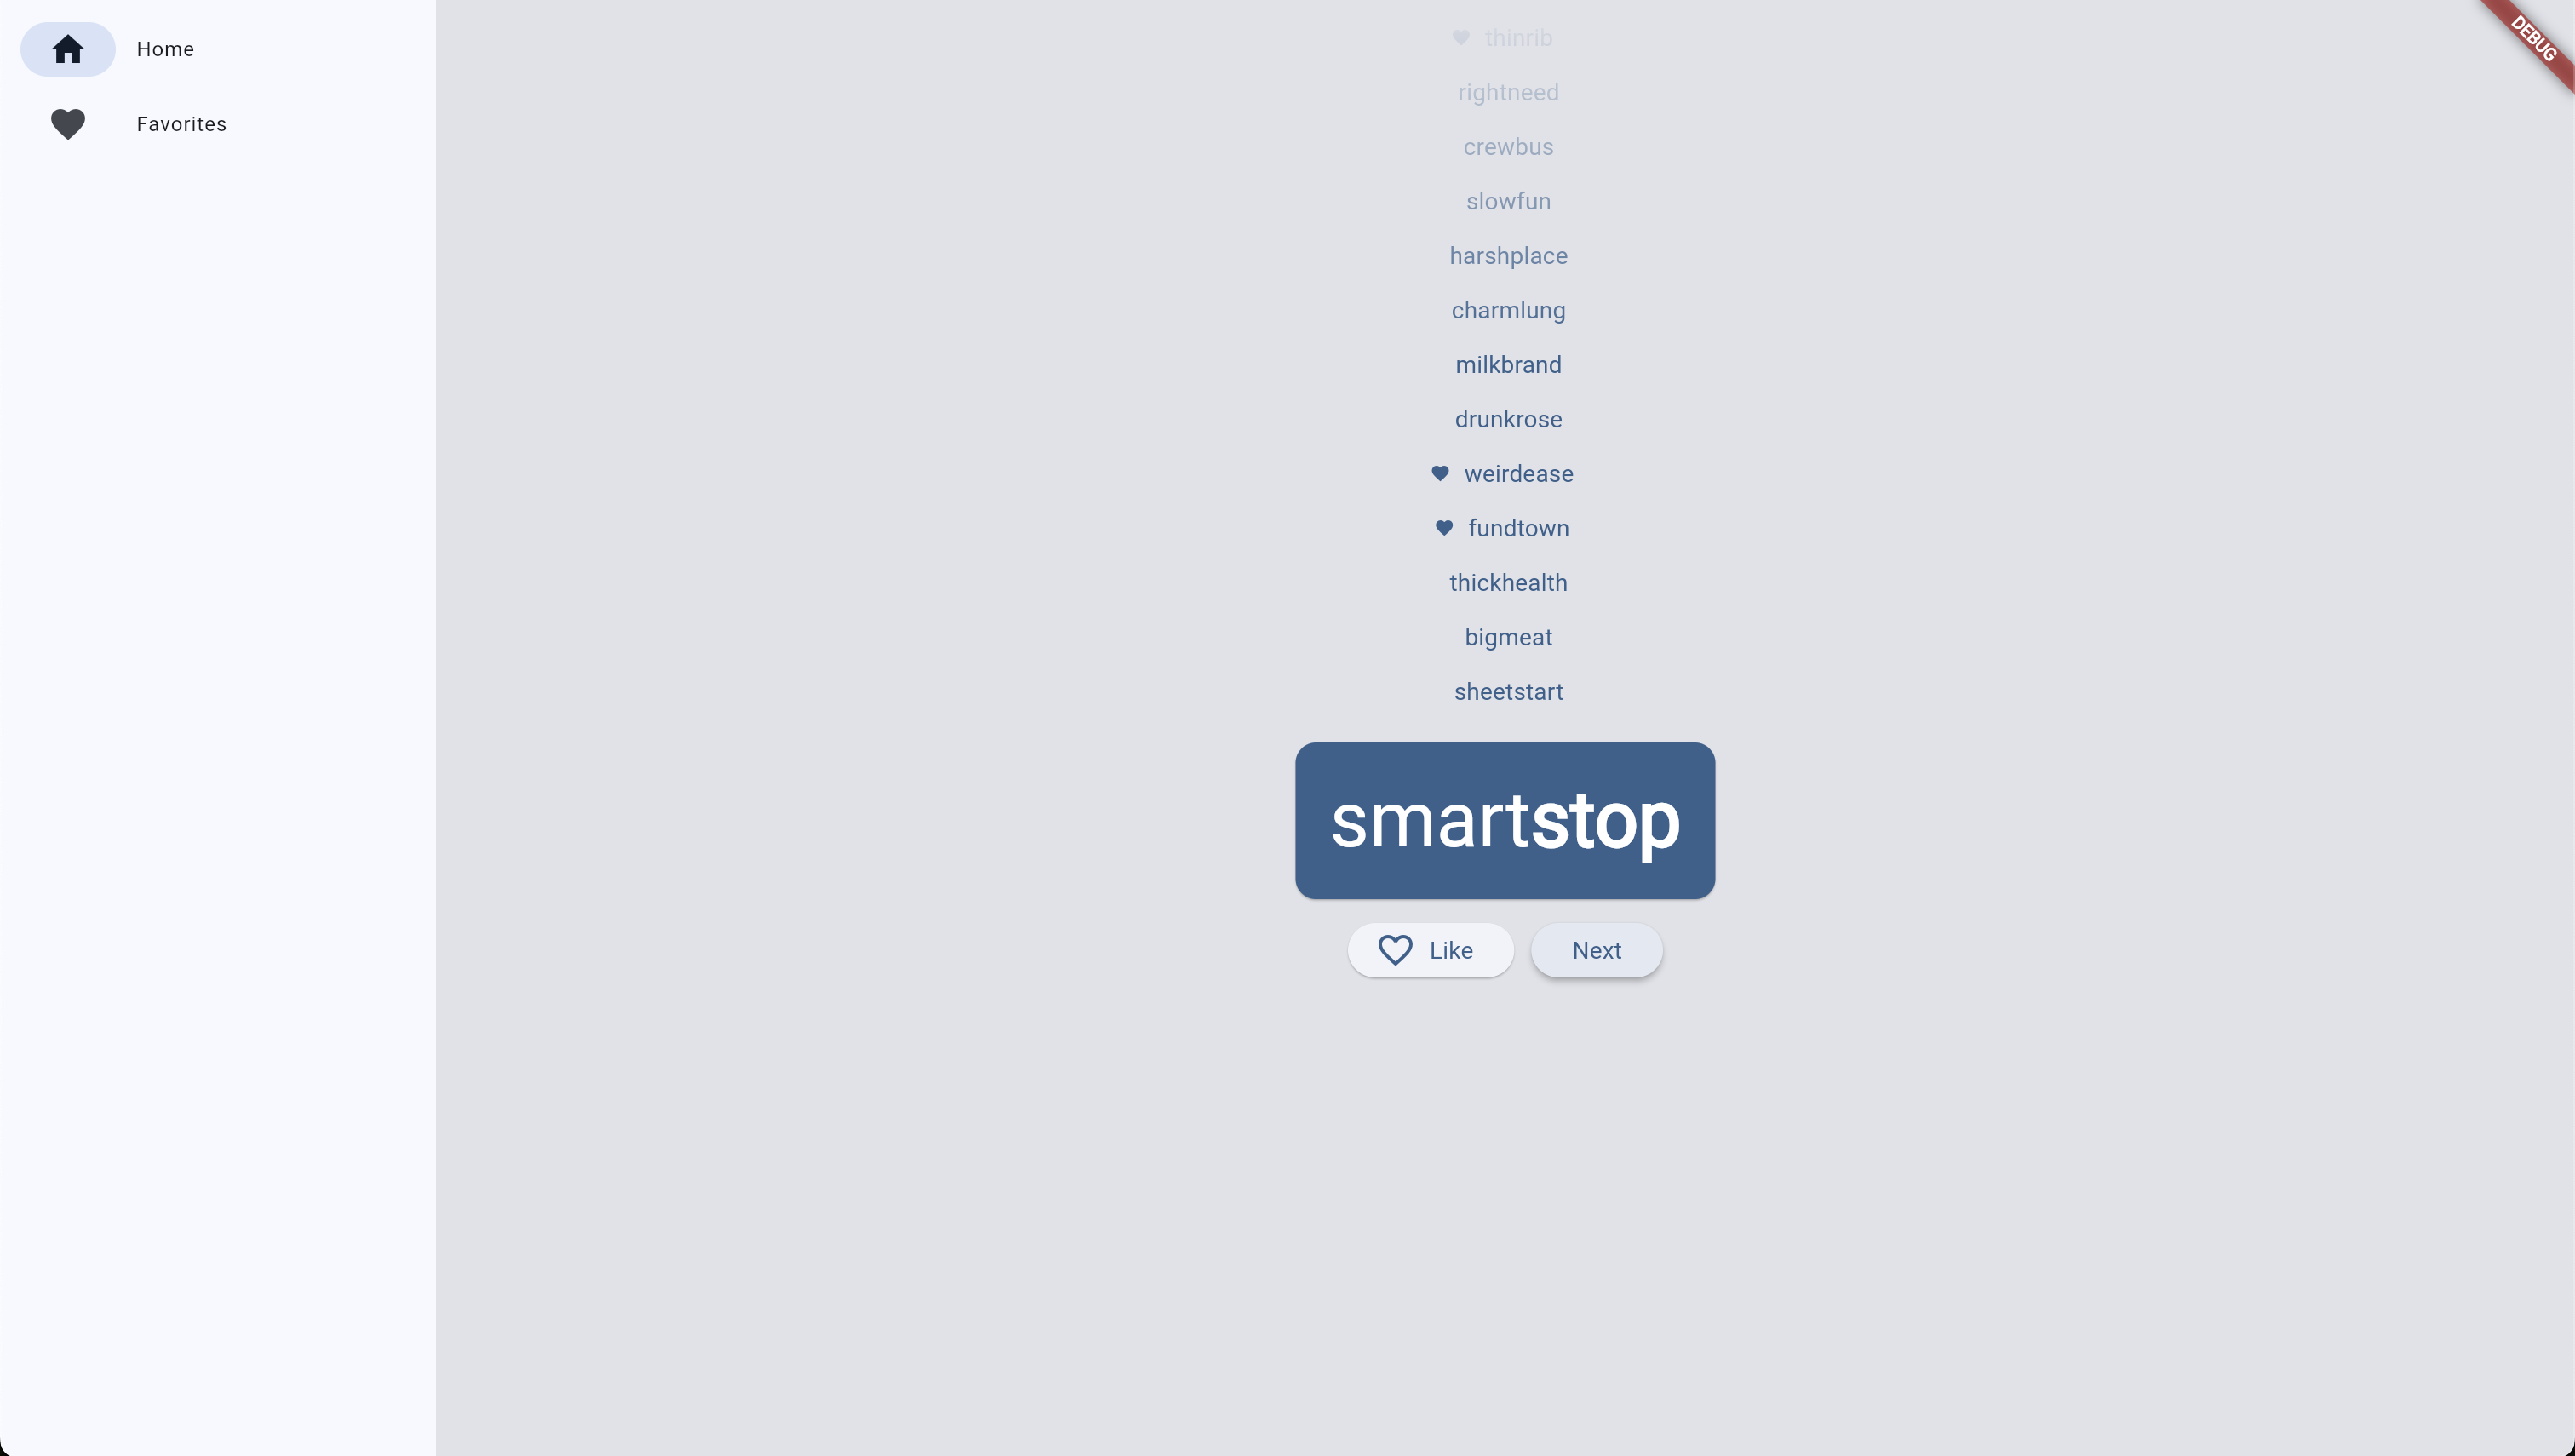
The first will show the current generated word along with a history of all previously generated words. It will have a button to like the word and a button to generate the next word.

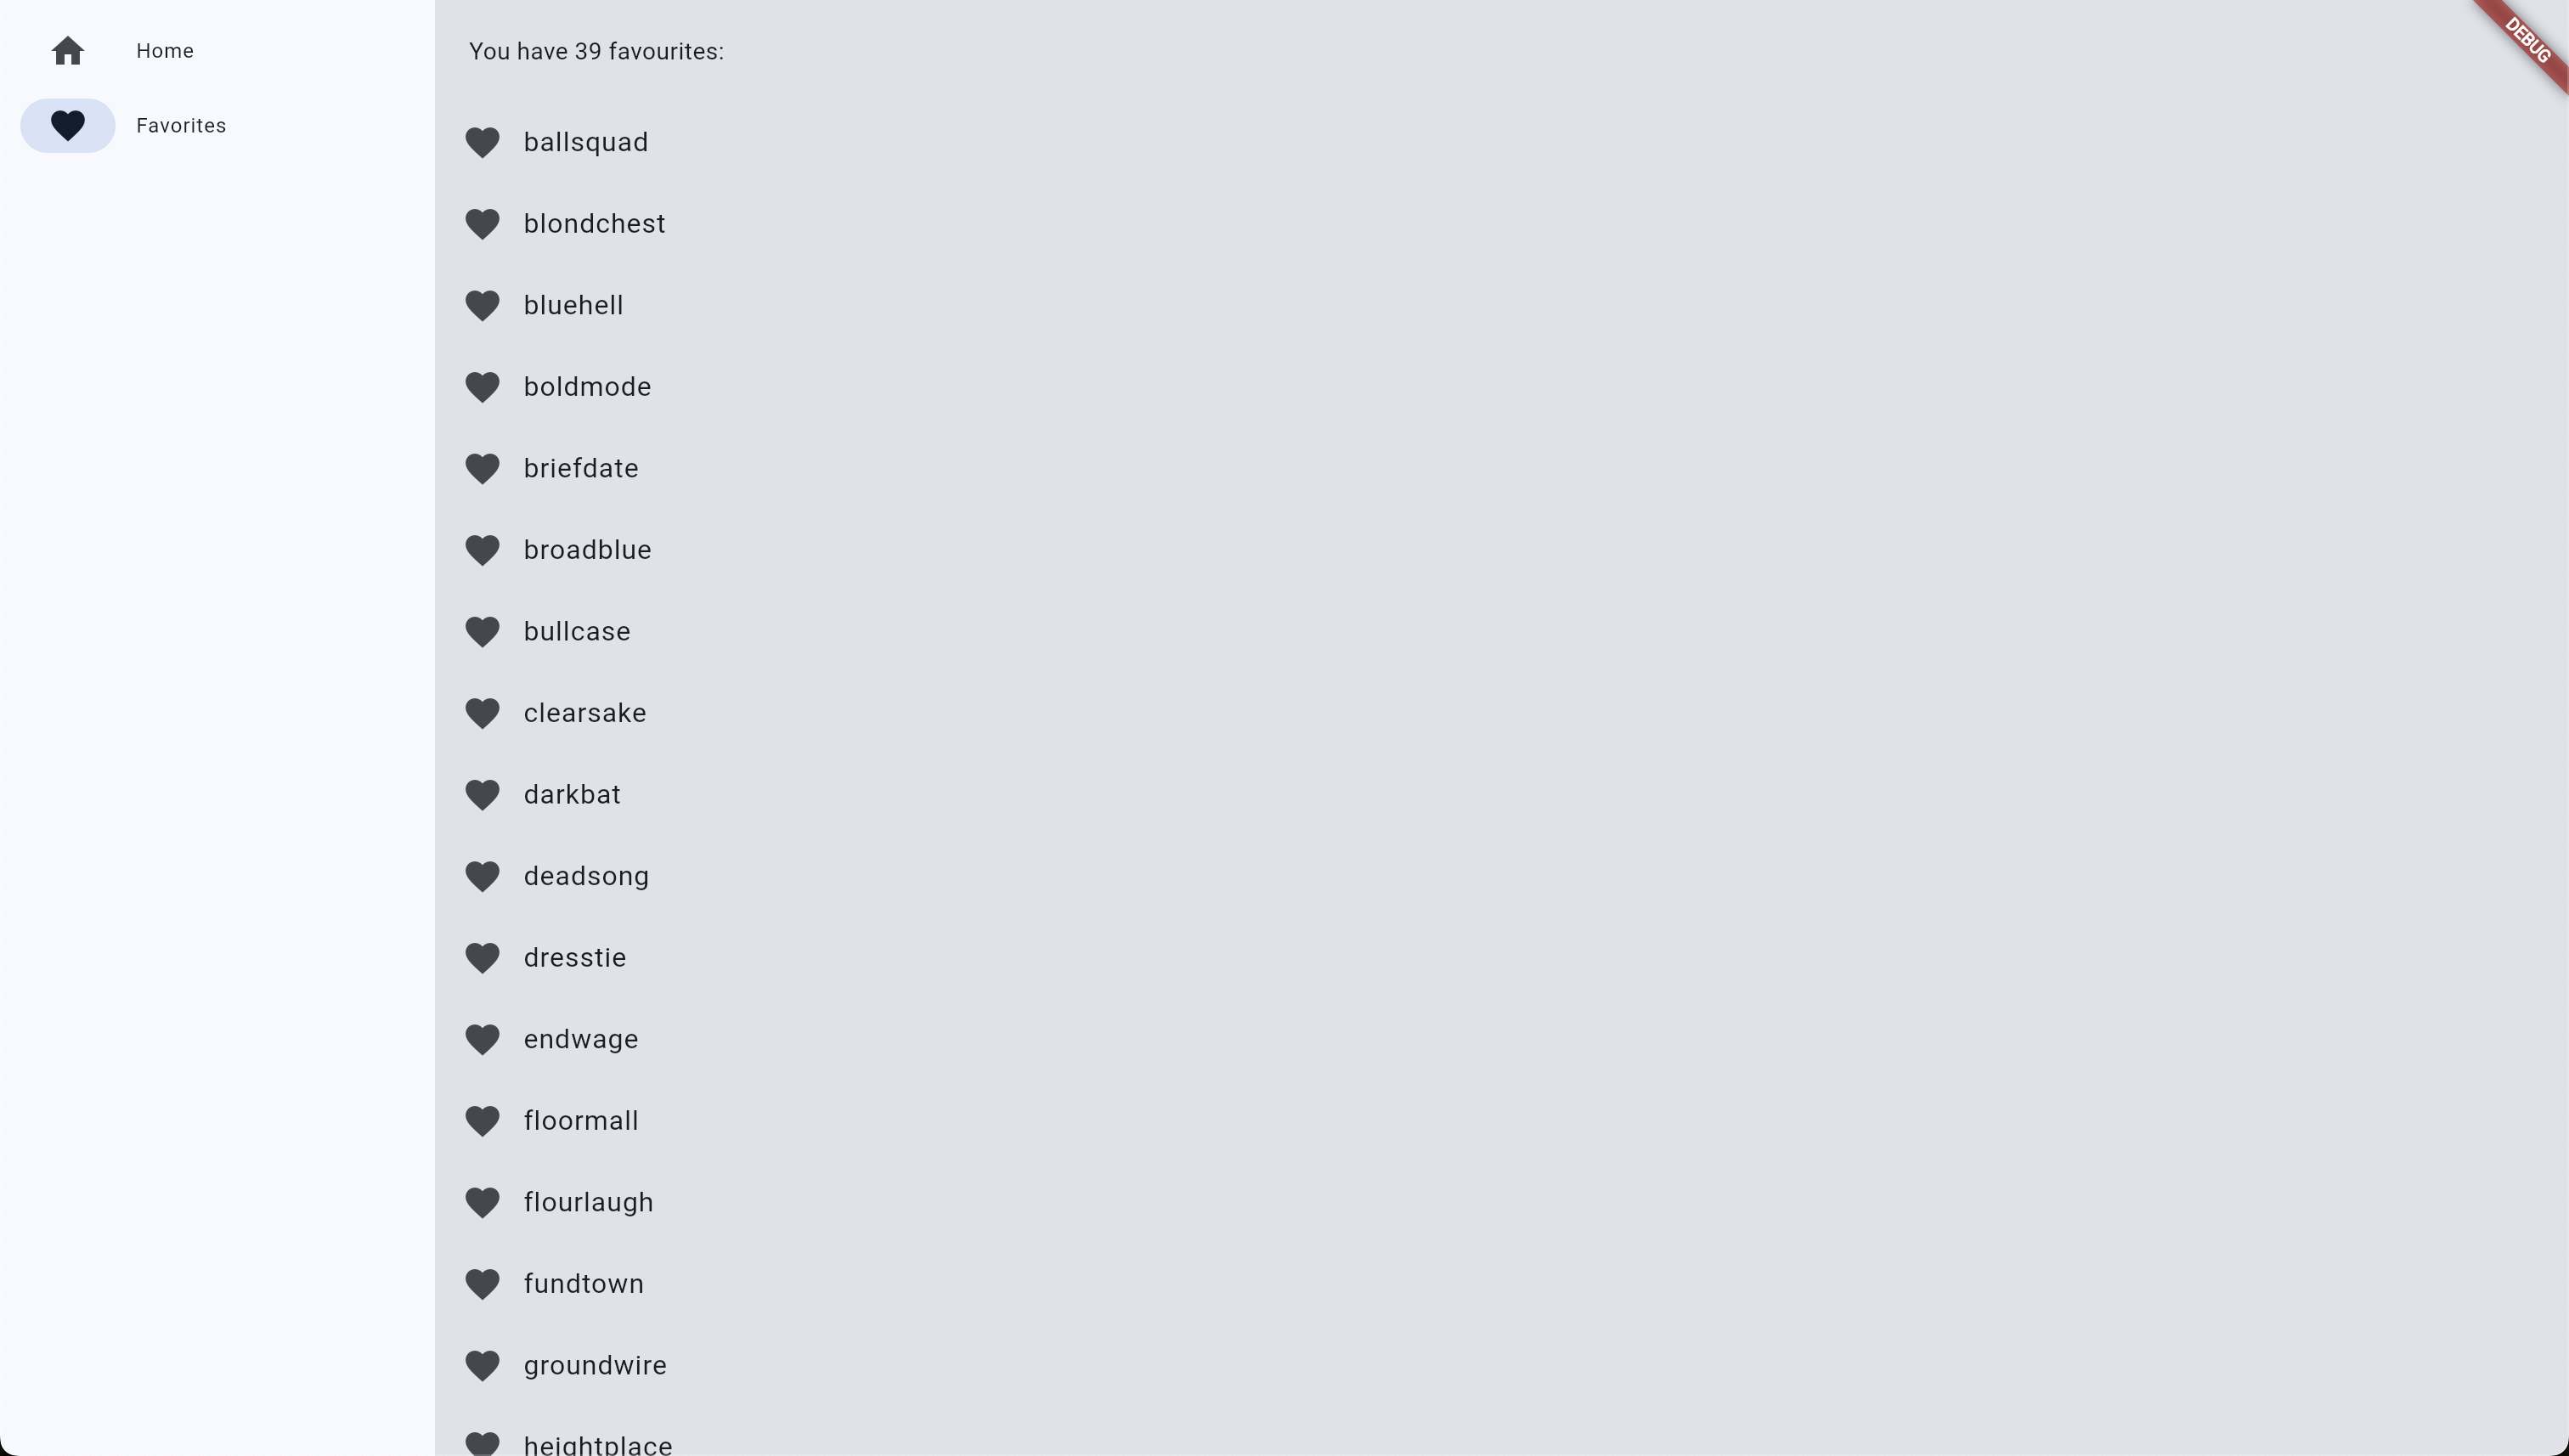
The second page will show the list of favorites if there are any, otherwise it will display that there are no word pairs currently liked.

Providers
Before creating these pages, we'll first create the data providers as these are required for the pages to function. These will be split into a provider for word generation and a provider for favorites gathering. These will both be ChangeNotifiers to allow for dynamic updates to the pages.
Let's start with the word provider. For this you'll need to add the english_words dependency to generate new words.
flutter pub add english_words
We can then build the WordProvider.
import 'package:english_words/english_words.dart';import 'package:flutter/material.dart';class WordProvider extends ChangeNotifier {// The current word pairvar current = WordPair.random();}
We'll then define a function for getting a new word pair and notifying the listeners.
// Generate a new word pair and notify the listenersvoid getNext() {current = WordPair.random();notifyListeners();}
We can then build the FavoritesProvider. This will use the Nitric API to get a list of favorites and also toggle if a favorite is liked or not. To start, we'll define our FavoritesProvider and add the attributes for setting the list of favorites and whether the list is loading.
import 'dart:convert';import 'package:flutter/material.dart';import 'package:word_generator/favorite.dart';import 'package:http/http.dart' as http;class FavoritesProvider extends ChangeNotifier {final baseApiUrl = "http://localhost:4001";List<Favorite> _favorites = [];bool _isLoading = false;/// Get a list of active favoritesList<Favorite> get favorites => _favorites;/// Check whether the data is loading or notbool get isLoading => _isLoading;}
We'll then add a method for getting a list of favorites and notifying the listeners. For this we require the http package to make requests to our API.
flutter pub add http
/// Updates the list of favorites whilst returning a Future with the list of favorites./// Sets isLoading to true when the favorites have been fetchedFuture<List<Favorite>> fetchData() async {_isLoading = true;notifyListeners();final response = await http.get(Uri.parse("$baseApiUrl/favorites"));if (response.statusCode == 200) {// Decode the json data into an iterable list of unknown objectsIterable rawfavorites = jsonDecode(response.body);// Map over the iterable, converting it to a list of favorite objects_favorites =List<Favorite>.from(rawfavorites.map((model) => Favorite.fromJson(model)));} else {throw Exception('Failed to load data');}_isLoading = false;notifyListeners();return _favorites;}}
We can then make a function for listeners to check if a word pair has been liked. This requires the english_words package for importing the WordPair typing.
import 'dart:convert';/// Add english words import/// Checks if the word pair exists in the list of favoritesbool hasfavorite(WordPair pair) {if (isLoading) {return false;}return _favorites.any((f) => f.name == pair.asLowerCase);}}
Finally, we'll define a function for toggling a word pair as being liked or not.
/// Toggles whether a favorite being liked or unliked.Future<void> toggleFavorite(WordPair pair) async {// Convert the word pair into a json encoded favoritefinal encodeFavorites = jsonEncode(Favorite.toJson(Favorite(pair.asLowerCase)));// Makes a post request to the toggle favorite route.final response = await http.post(Uri.parse("$baseApiUrl/favorite"), body: encodedFavorites);// If the response doesn't respond with OK, throw an errorif (response.statusCode != 200) {throw Exception("Failed to add favorite: ${response.body}");}// If it was successfully removed, update favoritesif (hasFavorite(pair)) {// Remove the favorite_favorites.removeWhere((f) => f.name == pair.asLowerCase);} else {_favorites.add(Favorite(pair.asLowerCase));}notifyListeners();}}
Generator Page
We can now build our generator page, the central functionality of our application. Add the provider package to be able to respond to change notifier events.
flutter pub add provider
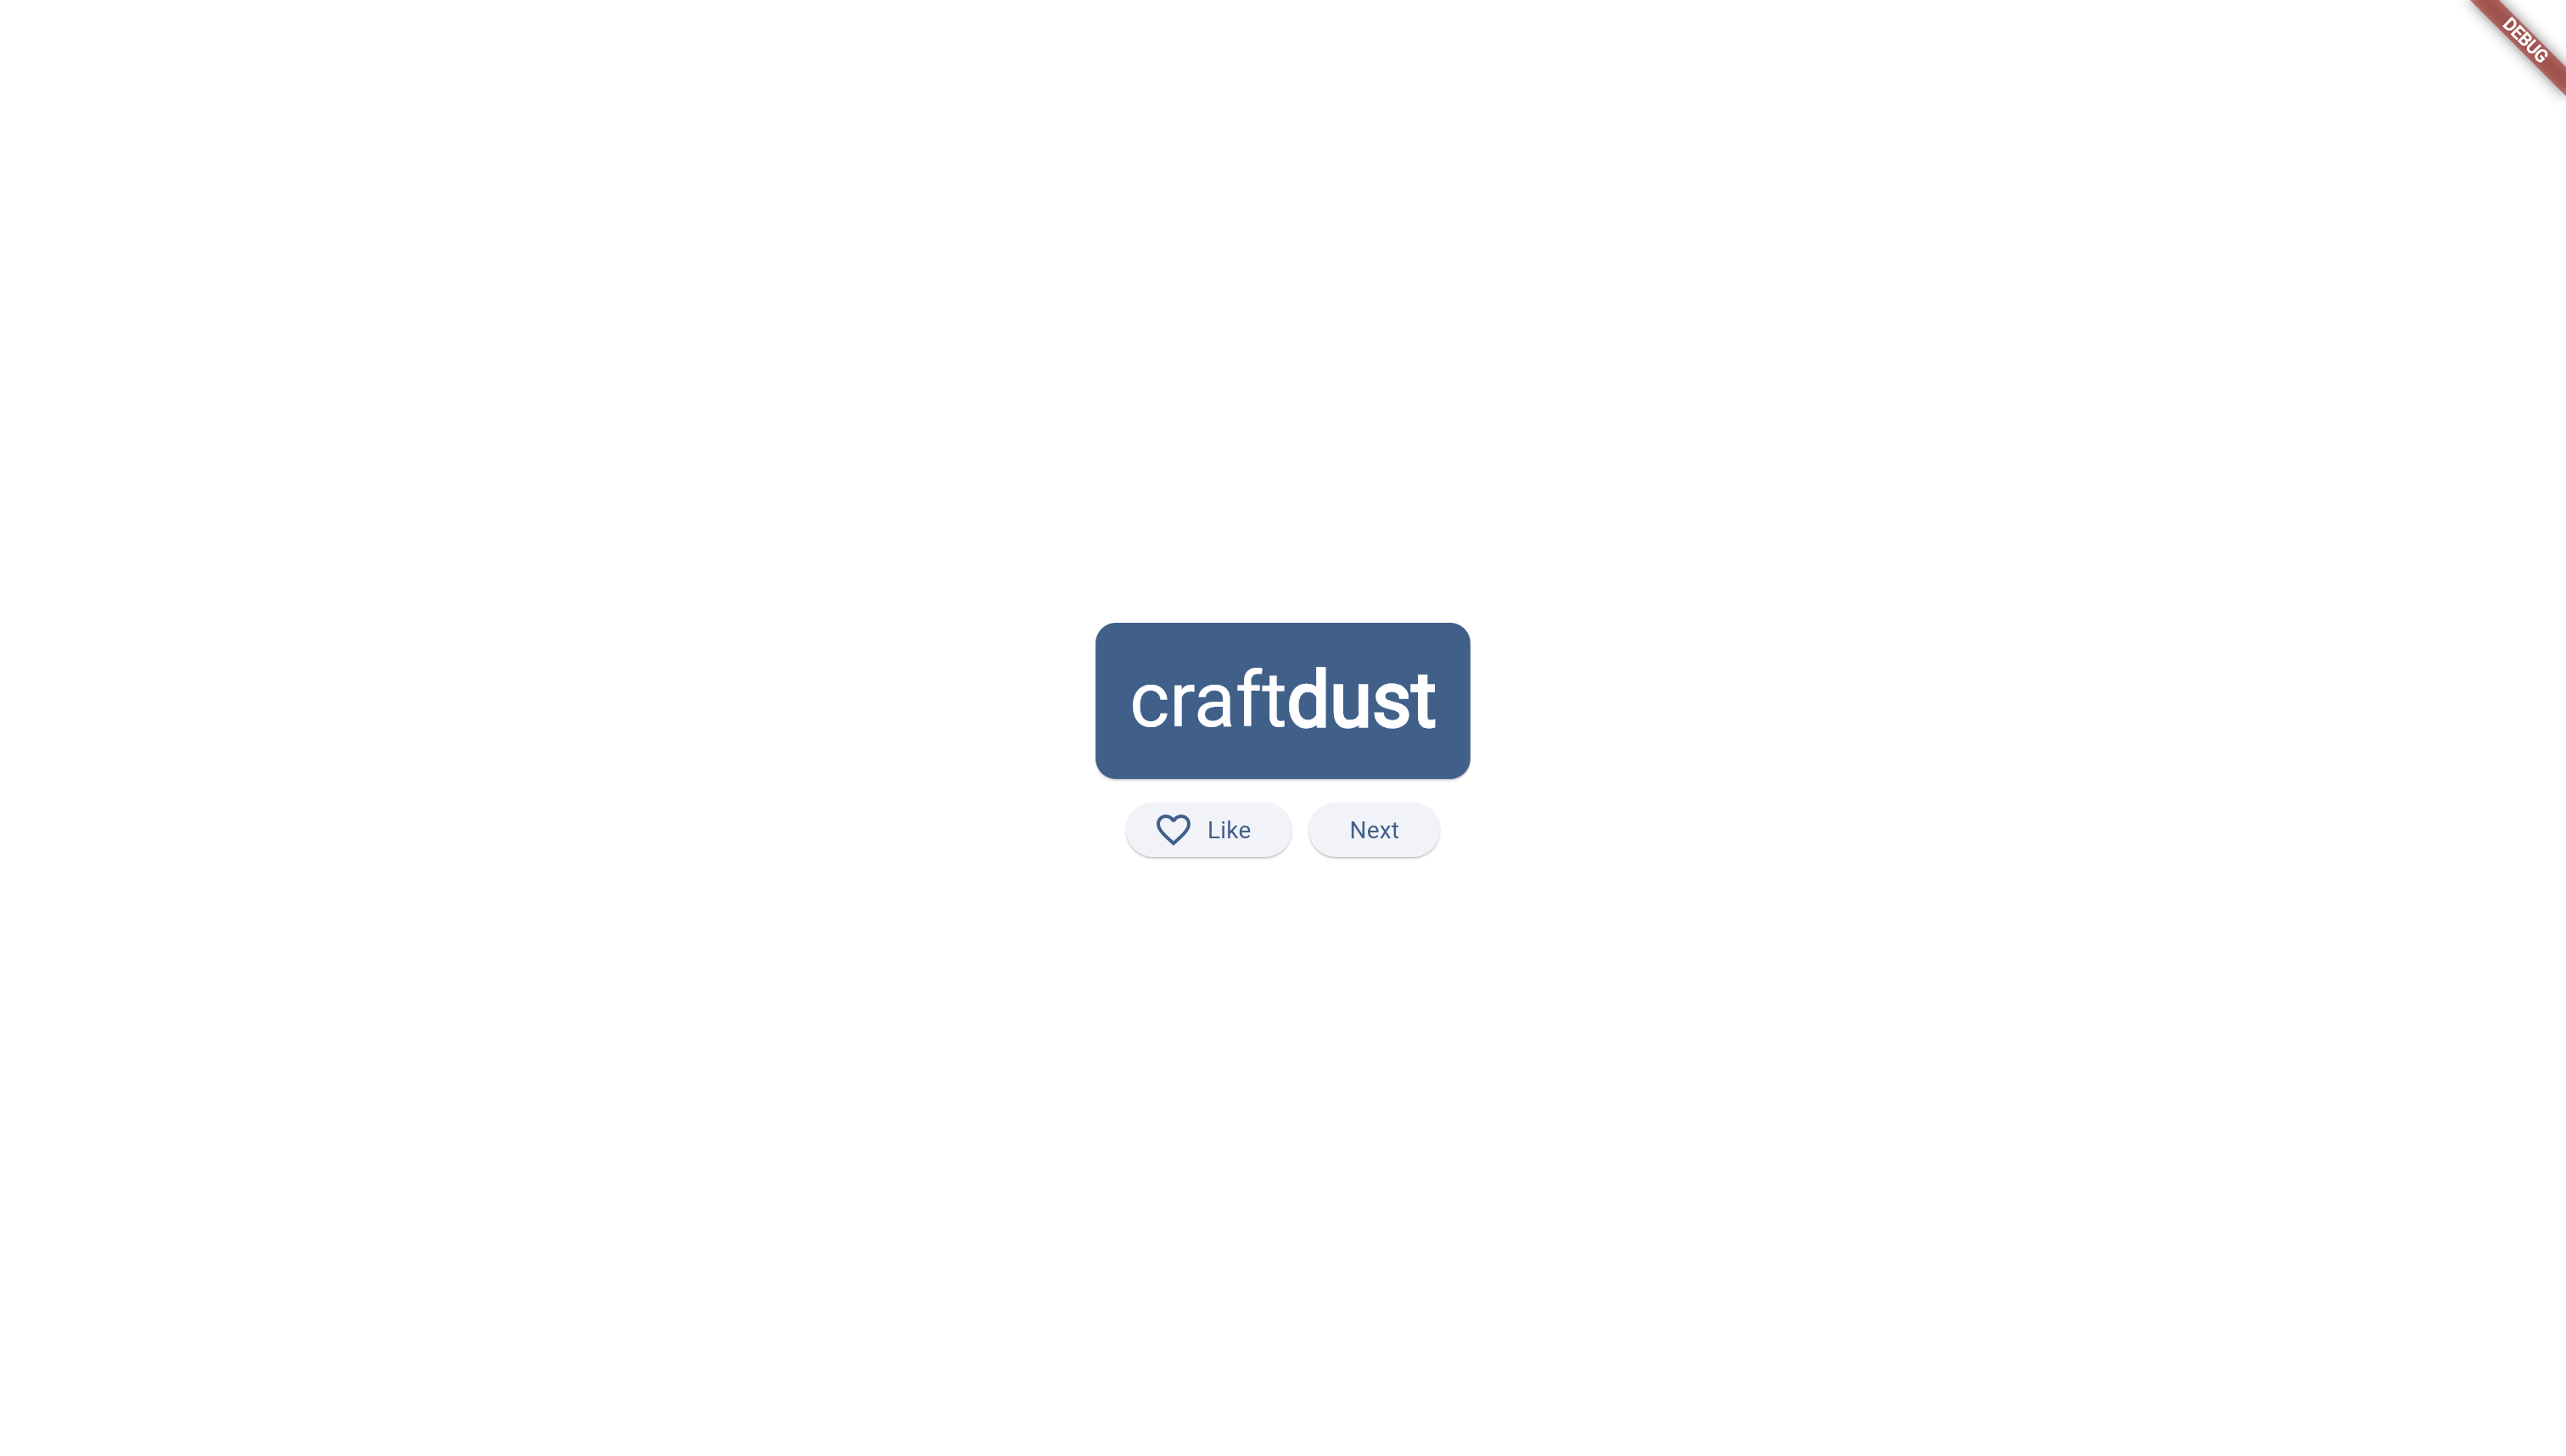
You can then create the generator page with the following stateless widget. This will display a card with the generated word, along with a button for liking the word pair or generating the next pair.
import 'package:flutter/material.dart';import 'package:provider/provider.dart';import 'package:word_generator/providers/favorites.dart';import 'package:word_generator/providers/word.dart';class GeneratorPage extends StatelessWidget {@overrideWidget build(BuildContext context) {// Get a reference to the current color schemefinal theme = Theme.of(context);final style = theme.textTheme.displayMedium!.copyWith(color: theme.colorScheme.onPrimary,);// Start listening to both the favorites and the word providersfinal favorites = context.watch<FavoritesProvider>();final words = context.watch<WordProvider>();IconData icon = Icons.favorite_border;if (favorites.hasfavorite(words.current)) {icon = Icons.favorite;}return Center(child: Column(mainAxisAlignment: MainAxisAlignment.center,children: [// Card to display the word pair generatedCard(color: theme.colorScheme.primary,child: Padding(padding: const EdgeInsets.all(20),// Smooth animate the box changing sizechild: AnimatedSize(duration: Duration(milliseconds: 200),child: MergeSemantics(child: Wrap(children: [Text(words.current.first,style: style.copyWith(fontWeight: FontWeight.w200),),Text(words.current.second,style: style.copyWith(fontWeight: FontWeight.bold),)],),),),),),SizedBox(height: 10),Row(mainAxisSize: MainAxisSize.min,children: [// Button to like the current word pairElevatedButton.icon(onPressed: () {favorites.togglefavorite(words.current);},icon: Icon(icon),label: Text('Like'),),SizedBox(width: 10),// Button to generate the next word pairElevatedButton(onPressed: () {words.getNext();},child: Text('Next'),),],),],),);}}
To test this generation we can build the application entrypoint to run our application. In this application we use a MultiProvider to supply the child pages with the ability to listen to the FavoritesProvider and the WordProvider.
import 'package:flutter/material.dart';import 'package:provider/provider.dart';import 'package:word_generator/pages/generator.dart';import 'package:word_generator/providers/favorites.dart';import 'package:word_generator/providers/word.dart';// Start the applicationvoid main() => runApp(Application());class Application extends StatelessWidget {const Application({super.key});@overrideWidget build(BuildContext context) {return MultiProvider(// Allow the child pages to reference the data providersproviders: [ChangeNotifierProvider(create: (context) => FavoritesProvider()),ChangeNotifierProvider(create: (context) => WordProvider()),],child: MaterialApp(title: 'Word Generator App',theme: ThemeData(useMaterial3: true,// Set the default color for the application.colorScheme: ColorScheme.fromSeed(seedColor: Colors.blue),),// Set the home page to the generator pagehome: GeneratorPage(),),);}}
You can test the generator page by starting the API and running the flutter app. Use the following commands (in separate terminals):
nitric startflutter run -d chrome
This page should currently look like so:

Optional: History Animation
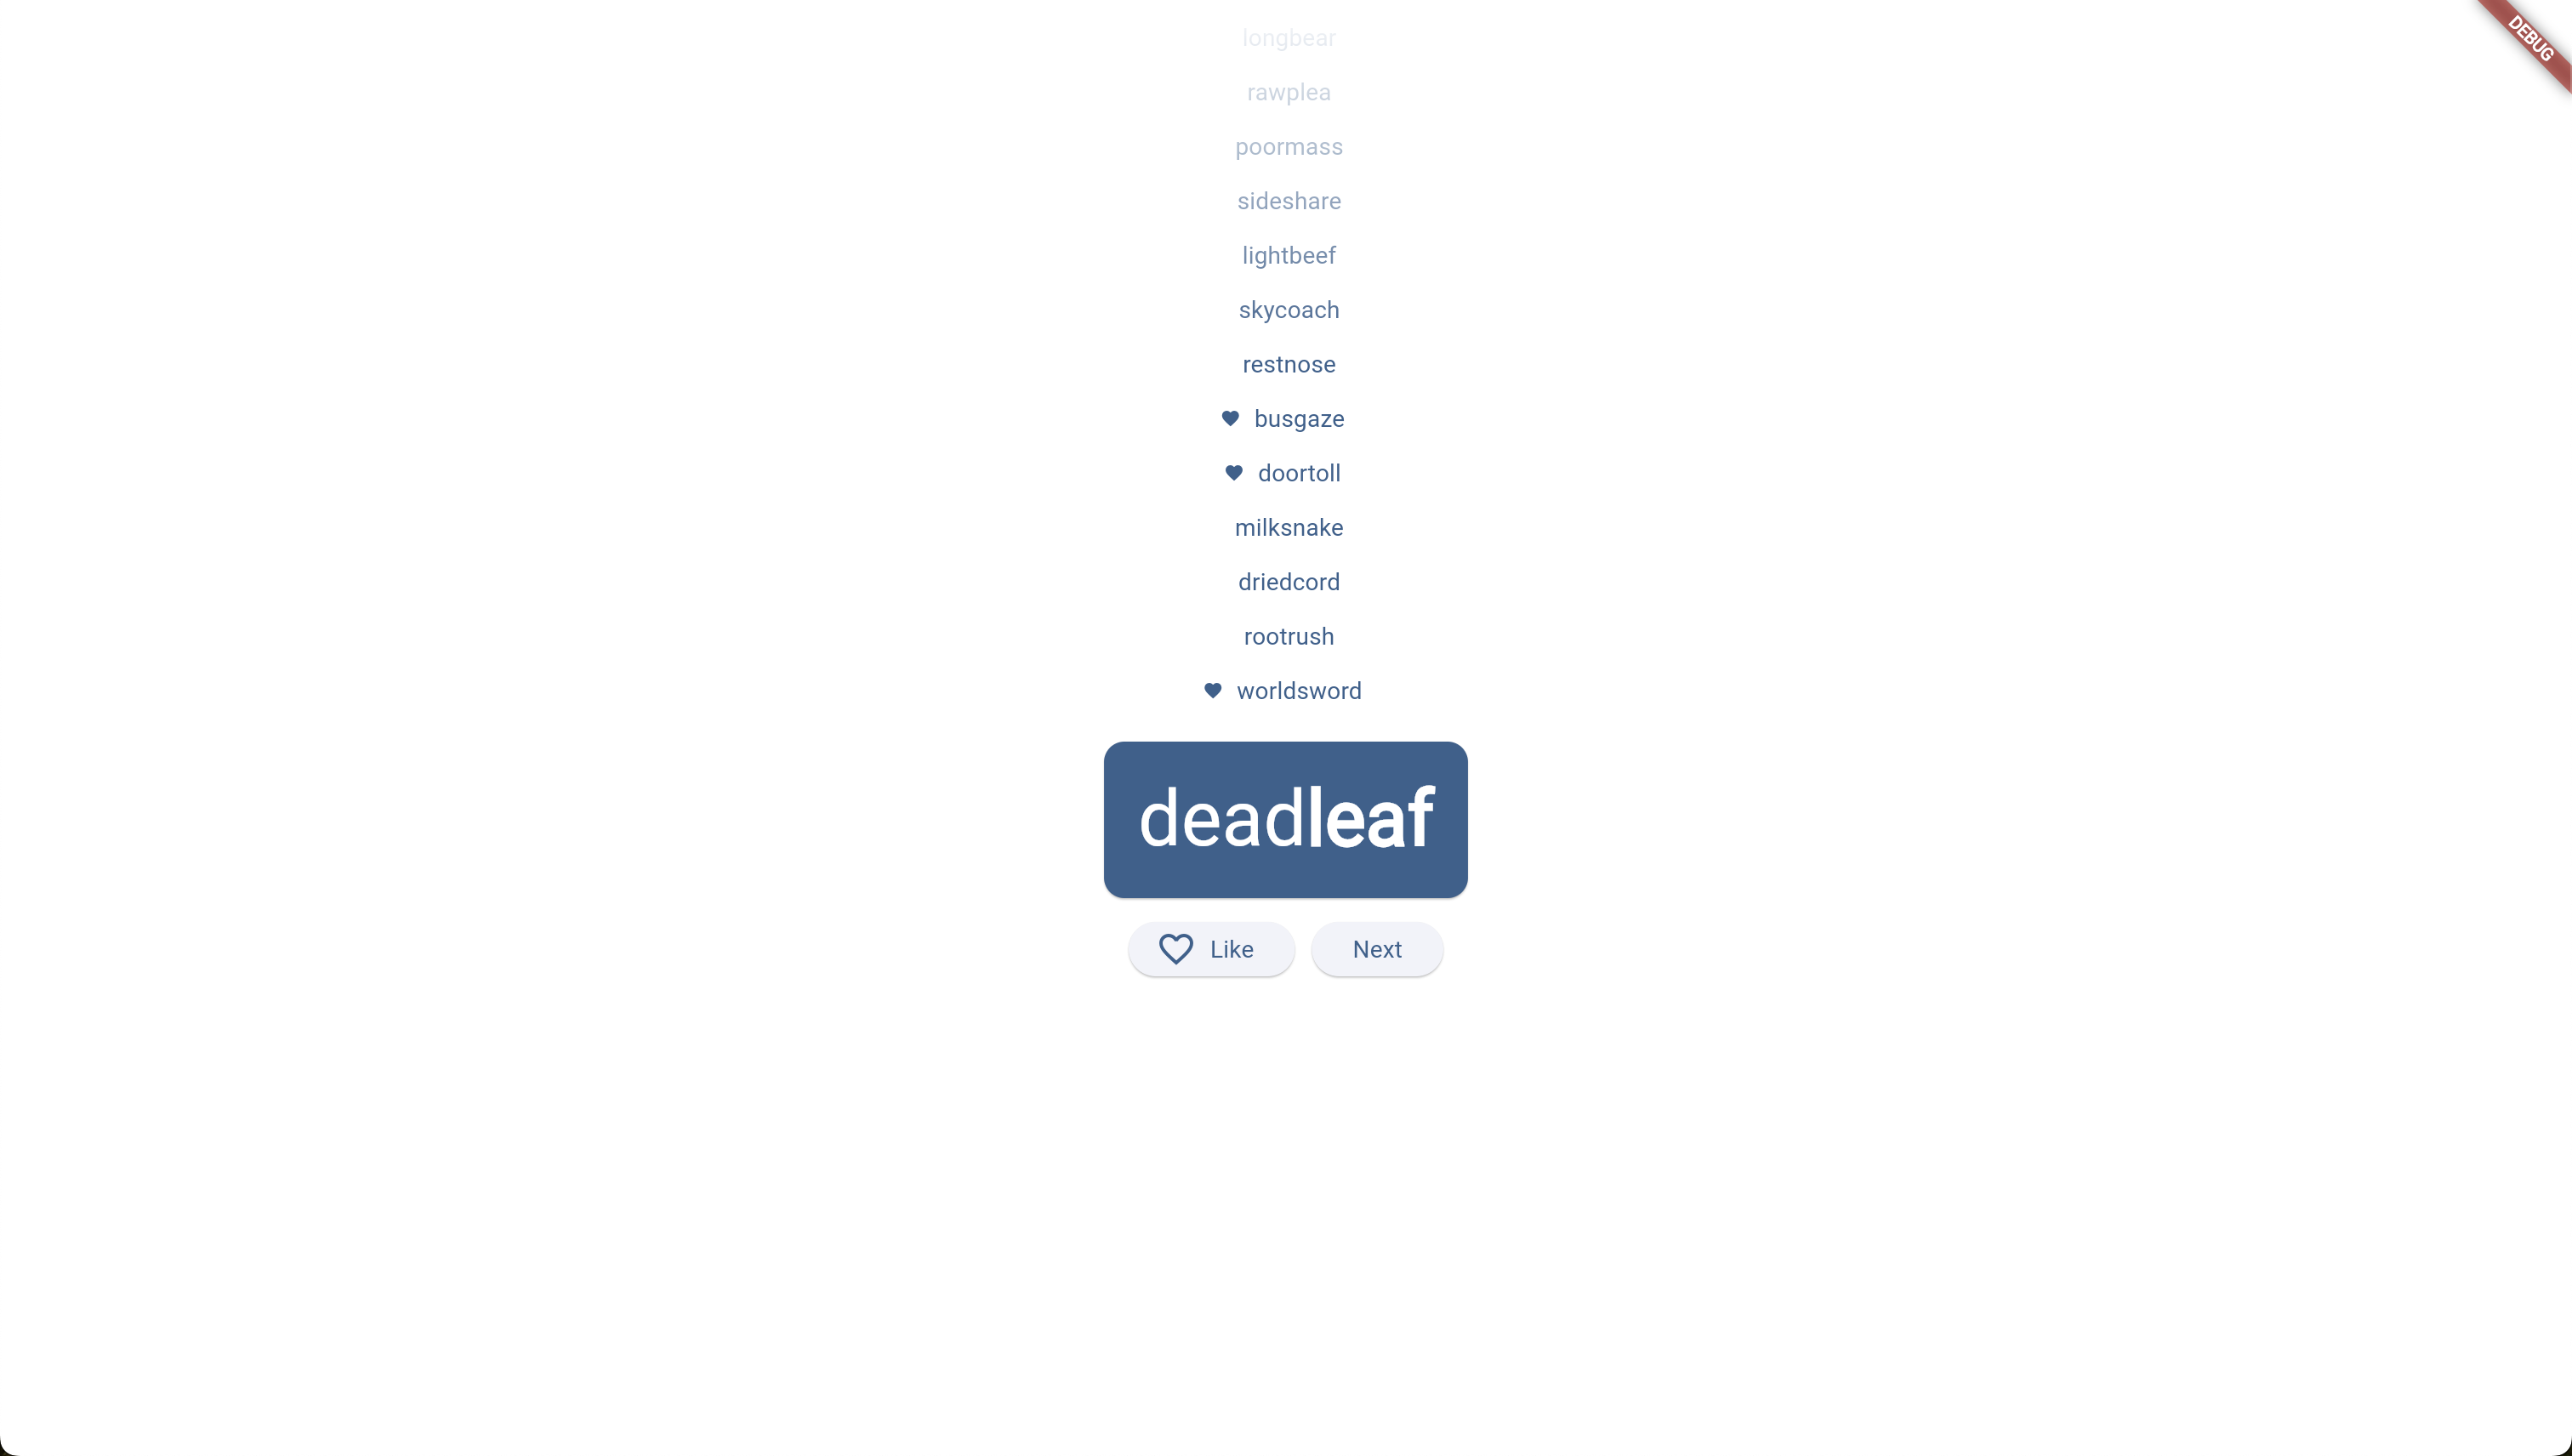
We can add a list of previously generated word pairs to make our generator page more interesting. This will be a trailing list which will slowly get more transparent as it goes off the page. We'll start by updating our WordProvider with history.
import 'package:english_words/english_words.dart';import 'package:flutter/material.dart';class WordProvider extends ChangeNotifier {// The current word pairvar current = WordPair.random();// A list of all generated word pairsvar history = <WordPair>[];// A key that is used to get a reference to the history list stateGlobalKey? historyListKey;// Generate a new word pair and notify the listenersvoid getNext() {// Add the current pair to the start of the history listhistory.insert(0, current);// Adds space to the start of the animated list and triggers an animation to startvar animatedList = historyListKey?.currentState as AnimatedListState?;animatedList?.insertItem(0);current = WordPair.random();notifyListeners();}}
These new features in the word pair will be used by a new widget called HistoryListView that will be used by the GeneratorPage. You can add this to the bottom of the generator page.
class HistoryListView extends StatefulWidget {const HistoryListView({super.key});@overrideState<HistoryListView> createState() => _HistoryListViewState();}class _HistoryListViewState extends State<HistoryListView> {final _key = GlobalKey();// Create a linear gradient mask from transparent to opaque.static const Gradient _maskingGradient = LinearGradient(colors: [Colors.transparent, Colors.black],stops: [0.0, 0.5],begin: Alignment.topCenter,end: Alignment.bottomCenter,);@overrideWidget build(BuildContext context) {final favorites = context.watch<FavoritesProvider>();final words = context.watch<WordProvider>();words.historyListKey = _key;return ShaderMask(shaderCallback: (bounds) => _maskingGradient.createShader(bounds),// This blend mode takes the opacity of the shader (i.e. our gradient)// and applies it to the destination (i.e. our animated list).blendMode: BlendMode.dstIn,child: AnimatedList(key: _key,// Reverse the list so the latest is on the bottomreverse: true,padding: EdgeInsets.only(top: 100),initialItemCount: words.history.length,// Build each item in the list, will be run initially and when a new word pair is added.itemBuilder: (context, index, animation) {final pair = words.history[index];return SizeTransition(sizeFactor: animation,child: Center(child: TextButton.icon(onPressed: () {favorites.togglefavorite(pair);},// If the word pair was favorited, show a heart next to iticon: favorites.hasfavorite(pair)? Icon(Icons.favorite, size: 12): SizedBox(),label: Text(pair.asLowerCase,),),),);},),);}}
With that built you can update the return value of the GeneratorPage.
return Center(child: Column(mainAxisAlignment: MainAxisAlignment.center,children: [// Allows the history list to extend to the top of the pageExpanded(flex: 3,child: HistoryListView(),),SizedBox(height: 10),),SizedBox(height: 10),),// Keeps the card centeredSpacer(flex: 2),],),);
If you reload the flutter app it should now display your history when you click through the words.

Favorites Page
The favorites page will simply list all the favorites and the number that have been liked:
import 'package:flutter/material.dart';import 'package:word_generator/providers/favorites.dart';import 'package:provider/provider.dart';class FavoritesPage extends StatelessWidget {@overrideWidget build(BuildContext context) {var favorites = context.watch<FavoritesProvider>();// If the favorites list is still loading then show a spinning circle.if (favorites.isLoading) {return Center(child: SizedBox(width: 40,height: 40,child: CircularProgressIndicator(color: Colors.blue),));}// Otherwise return a list of all the favoritesreturn ListView(children: [Padding(padding: const EdgeInsets.all(20),// Display how many favorites there arechild: Text('You have ''${favorites.favorites.length} favorites:'),),// Create a list tile for every favorite in the list of favoritesfor (var favorite in favorites.favorites)ListTile(leading: Icon(Icons.favorite), // <- A heart icontitle: Text(favorite.name),),],);}}
You might notice that at no point is the favorites list actually being fetched, so the FavoritesProvider will always contain an empty favorites list. This will be handled in the next section where we build the navigation.
Navigation
To finish, we'll add the navigation page. This will wrap the GeneratorPage and the favoritesPage and allow a user to switch between them through a navigation bar. This will be responsive, with a desktop having it appear on the side and a mobile appearing at the bottom. It will be a StatefulWidget so it can maintain the page that is being viewed. In the initState we will fetch the favorites data.
Start by scaffolding the main page StatefulWidget and State.
import 'package:flutter/material.dart';import 'package:word_generator/providers/favorites.dart';import 'package:provider/provider.dart';import 'favorites.dart';import 'generator.dart';class HomePage extends StatefulWidget {@overrideState<HomePage> createState() => _HomePageState();}class _HomePageState extends State<HomePage> {// The page that the user is currently viewing: Generator (0) or Favorites (1)var selectedIndex = 0;@overridevoid initState() {super.initState();// Fetchcontext.read<FavoritesProvider>().fetchData();}}
We then want to fill out the build function so it returns the current page. This will be wrapped in a ColoredBox that has a consistent background color between all pages.
@overrideWidget build(BuildContext context) {Widget page;switch (selectedIndex) {case 0:page = GeneratorPage();case 1:page = FavoritesPage();default:throw UnimplementedError('no widget for $selectedIndex');}var colorScheme = Theme.of(context).colorScheme;// The container for the current page, with its background color// and subtle switching animation.var mainArea = ColoredBox(color: colorScheme.surfaceContainerHighest,child: AnimatedSwitcher(duration: Duration(milliseconds: 200),child: page,),);return mainArea;}
You can now set the application's entrypoint page to be the HomePage now in lib/main.dart
class Application extends StatelessWidget {const Application({super.key});@overrideWidget build(BuildContext context) {return MultiProvider(providers: [ChangeNotifierProvider(create: (context) => FavoritesProvider()),ChangeNotifierProvider(create: (context) => WordProvider()),],child: MaterialApp(title: 'Word Generator App',theme: ThemeData(useMaterial3: true,colorScheme: ColorScheme.fromSeed(seedColor: Colors.blue),),home: HomePage(), // <- Change here),);}}
For now, you can test both pages by swapping the selectedIndex manually. We'll then want to build out a navigation bar for desktop and for mobile. For this we will use a LayoutBuilder to check if the screen width is less than 450px.
return Scaffold(body: LayoutBuilder(builder: (context, constraints) {if (constraints.maxWidth < 450) {// return mobile navigation} else {// return desktop navigation}}))}
Starting with the mobile navigation:
return Column(children: [Expanded(child: mainArea),SafeArea(child: BottomNavigationBar(items: [BottomNavigationBarItem(icon: Icon(Icons.home),label: 'Home',),BottomNavigationBarItem(icon: Icon(Icons.favorite),label: 'Favorites',),],currentIndex: selectedIndex,onTap: (value) {setState(() {selectedIndex = value;});},),)],);
And then finally the desktop navigation:
return Row(children: [SafeArea(child: NavigationRail(// Display only icons if screen width is less than 600pxextended: constraints.maxWidth >= 600,destinations: [NavigationRailDestination(icon: Icon(Icons.home),label: Text('Home'),),NavigationRailDestination(icon: Icon(Icons.favorite),label: Text('Favorites'),),],selectedIndex: selectedIndex,onDestinationSelected: (value) {setState(() {selectedIndex = value;});},),),Expanded(child: mainArea),],);
Altogether, the page code should look like this:
import 'package:flutter/material.dart';import 'package:provider/provider.dart';import 'package:word_generator/providers/favorites.dart';import 'favorites.dart';import 'generator.dart';class HomePage extends StatefulWidget {@overrideState<HomePage> createState() => _HomePageState();}class _HomePageState extends State<HomePage> {var selectedIndex = 0;@overridevoid initState() {super.initState();context.read<FavoritesProvider>().fetchData();}@overrideWidget build(BuildContext context) {var colorScheme = Theme.of(context).colorScheme;Widget page;switch (selectedIndex) {case 0:page = GeneratorPage();case 1:page = FavoritesPage();default:throw UnimplementedError('no widget for $selectedIndex');}// The container for the current page, with its background color// and subtle switching animation.var mainArea = ColoredBox(color: colorScheme.surfaceContainerHighest,child: AnimatedSwitcher(duration: Duration(milliseconds: 200),child: page,),);return Scaffold(body: LayoutBuilder(builder: (context, constraints) {if (constraints.maxWidth < 450) {return Column(children: [Expanded(child: mainArea),SafeArea(child: BottomNavigationBar(items: [BottomNavigationBarItem(icon: Icon(Icons.home),label: 'Home',),BottomNavigationBarItem(icon: Icon(Icons.favorite),label: 'Favorites',),],currentIndex: selectedIndex,onTap: (value) {setState(() {selectedIndex = value;});},),)],);} else {return Row(children: [SafeArea(child: NavigationRail(extended: constraints.maxWidth >= 600,destinations: [NavigationRailDestination(icon: Icon(Icons.home),label: Text('Home'),),NavigationRailDestination(icon: Icon(Icons.favorite),label: Text('Favorites'),),],selectedIndex: selectedIndex,onDestinationSelected: (value) {setState(() {selectedIndex = value;});},),),Expanded(child: mainArea),],);}},),);}}
Deployment
At this point, we can get started on deploying our application. The frontend application deployment depends on which platform you wish to deploy to. You can take a look at the Flutter documentation for this here. The backend will be deployed to one of the cloud platforms, AWS, Google Cloud, or Azure. This guide will demonstrate deploying to AWS.
For the backend, start by setting up your credentials and any configuration for the cloud you prefer:
Next, we'll need to create a stack. Stacks represent deployed instances of an application, including the target provider and other details such as the deployment region. You'll usually define separate stacks for each environment such as development, testing and production. For now, let's start by creating a dev stack for AWS.
nitric stack new dev aws
You'll then need to edit the nitric.dev.yaml file to add a region.
provider: nitric/aws@1.11.1region: us-east-1
Dockerfile
Because we've mixed Flutter and Dart dependencies, we need to use a custom container that fetches our dependencies using Flutter. You can point to a custom container in your nitric.yaml:
If you have a separate Dart backend that doesn't share dependencies with your Flutter application, this step is unnecessary.
name: word_generatorservices:- match: lib/services/*.dartruntime: flutter # <-- Specifies the runtime to usestart: dart run --observe $SERVICE_PATHruntimes:flutter:dockerfile: ./docker/flutter.dockerfile # <-- Specifies where to find the Dockerfileargs: {}
Create the Dockerfile at the same path as your runtime specifies. This Dockerfile is fairly straightforward, taking its
FROM dart:stable AS build# The Nitric CLI will provide the HANDLER arg with the location of our serviceARG HANDLERWORKDIR /appENV DEBIAN_FRONTEND=noninteractive# download Flutter SDK from Flutter Github repoRUN git clone https://github.com/flutter/flutter.git /usr/local/flutterENV DEBIAN_FRONTEND=dialog# Set flutter environment pathENV PATH="/usr/local/flutter/bin:/usr/local/flutter/bin/cache/dart-sdk/bin:${PATH}"# Run flutter doctorRUN flutter doctor# Resolve app dependencies.COPY pubspec.* ./RUN flutter pub get# Ensure the ./bin folder existsRUN mkdir -p ./bin# Copy app source code and AOT compile it.COPY . .# Ensure packages are still up-to-date if anything has changedRUN flutter pub get --offline# Compile the dart service into an exeRUN dart compile exe ./${HANDLER} -o bin/main# Start from scratch and copy in the necessary runtime filesFROM alpineCOPY --from=build /runtime/ /COPY --from=build /app/bin/main /app/bin/ENTRYPOINT ["/app/bin/main"]
We can also add a .dockerignore to optimize our image further:
buildtest.nitric.idea.dart_tool.gitdockerandroidioslinuxmacoswebwindows
AWS
Cloud deployments incur costs and while most of these resource are available with free tier pricing you should consider the costs of the deployment.
Now that the application has been configured for deployment, let's try deploying it with the up command.
nitric upAPI Endpoints:──────────────main: https://xxxxxxxx.execute-api.us-east-1.amazonaws.com
Once we have our API, we can update our flutter app to use the new endpoint. Go into the FavoritesProvider and set the baseApiUrl to your AWS endpoint.
class FavoritesProvider extends ChangeNotifier {final baseApiUrl = "https://xxxxxxxx.execute-api.us-east-1.amazonaws.com";
When you're done testing your application you can tear it down from the cloud, use the down command:
nitric down